Saturday 30 June 2012

Altered Paperbag with Tag

Hello crafty people; I have made an altered paperbag and tag set before but this one is using my most favourite colour combinations...white and kraft!  Again these were inspired by Julianna.

So without further blabbering here we go...
Featuring the altered bag, tag and mini shadow box

Front of the altered bag and tag

Flip side of the altered bag and tag


I had bought some christmas ornaments last year and it came in a box and of course the first thing I thought was to later it...who wouldn't??!!


\
I painted the box with white acrylic paint a few times. I glued Prima Printery paper to the inside panels before decorating. Here are closeup images of the panels and the decorations inside.


Here are some close ups of the mini paper bag and tags...

Front of paperbag
Back of paperbag

Front of tag

Back of tag

I love love love designing in these two colours!  The look is so serene and authentic; earthy and au natural! 

Let me know what you think...


Friday 29 June 2012

Top of My List 12x12 Layout

Hey hey hey crafty people!  How are things in your craft world??!!  Mine is pretty awesome!!! It is summer vacation time in Dubai and its hot hot hot!  Every year my daughters go home for the school break so this year I made a few layouts as gifts for family back home. I will be uploading the photos and the details one by one :-)

This layout I made for my stepdaughter Jessica - isnt she soooo pretty!!!!


I used one 12x12 sheet of paper from the DCWV La Creme Paper Stack and a couple of  6x6 sheets from the Travel Light paper stack from We R Memory Keepers.  Distressed the photo with my Tim Holtz paper distresser - only inking on this layout is around the edges - I used wild honey distress ink by Ranger..


The oval frame is from SEI; the tiny bows are from my stash. I made the heart and absolutely love how it turned out!  I cut 2 heart shapes from cardstock and 1 from the patterened paper.  I glued the patterened heart onto a cardstock heart, then the eyelet lace (which I ruffled ) to the back of the cardstock heart and then finally the last cardstock heart over the eyelet lace - kind of a paper sandwhich :-).  Some twine and a sticker sentiment completed my heart perfectly!

The scalloped heart and butterfly (above the heart and slightly to the right) I stenciled onto my base page with aged mohogany distress ink; I outlined the scalloped heart with glitter. All the element stickers are from This & That by Echo Park.


The lemon flower spray, tiny green roses and pearls are all from Prima.  Creme and white lace are from my stash and the border strip is also from the This & That Collection.  The pink butterfly was a set of butterfly cards I purchased on sale but never used - so I cut out the individual butterflies and use them in my projects. 


The green flower in the right hand corner was part of a 60's belt I bought at a flea market.  One of my favourite things to do is to buy non scrapbooking items and to use them in my projects!  Again the stickers are from the This & That Collection.


The brown swirls and paper doily I cut with my cameo - love my cameo!!  Pink flower is also from Prima; such pretty flowers!


The above image gives a better view of the doily I cut with my cameo!  The flower with the pearl center is also Prima but from a older collection.  The yellow flower is a hair accessory I took apart!


Thats it for this layout - I do hope you like it Jessica!

Thanks for stopping by and do leave a comment...

Wednesday 20 June 2012

DCWV Greeting Cards

Hello crafty lpeople, I hope everybody is having a happy crafty time!

I don't know about you guys but I can never seem to find the right card for the right occassion and personally I am normally not satisfied with the variety in the shops. So lucky me I can always make a few to have on hand just in case. The DCWV Tradewinds papers are so gorgeous and so versatile I decided to make 3 totally different greeting cards using the same paperstack.
You are Special Card
Black cardstock, Tradewind papers
Butterflies - Martha Stewart punch
Black rosette lace, black tiny flower spray
Sentiment printed on computer
Foam pads, silver glitter
Prima pearl swirl, bling
Rub ons, Tim Holtz paper distresser
Black flower, black leaf


Sweetheart Card

This card I made using the trellis technique.
Black + gold foil cardstock, Tradewinds papers
White cardstock for trellis effect
Black and red roses, stickpins
Gold glitter, sweetheart sentiment
Gold trim, glue, glue gun


Bon Voyage Card

White cardstock, Tradewinds papers
Sentiment, flags - on computer
Images from internet
Travel stamp sentiments
Toothpicks, glossy accents
Tim Holtz paper distresser
foam pads, glue


I hope you enjoy these projects as much as I enjoyed making them.

Remember ladies there is no right or wrong when it comes to scrapbooking! Surround yourself with beautiful papers and embelishments and you will create beautiful projects! So have fun fun fun!

Thanks for stopping by...


Monday 18 June 2012

All Bundled Up Layout

My husband is very partial to this photograph of me; it was around the time we met.  I usually do not scrap about me but on his insistence I promised to think about it.

While browsing a craft/art supply store a few months ago I noticed some stock of the Bobunny 'snowfall' collection.  I realised they went perfectly with the photograph and so I purchased two 12x12 sheets, a noteworthy pad and some stickers. I knew without a doubt that I would embellish with Wild Orchid Craft products; I rummaged through my stash, found some more matching embellishments and here it is...
...all bundled up in the winter of South Africa!
I fussy cut the flower shape on the top right hand side from the noteworthy selection and glued it onto black 12x12 chipboard.  I adhered the Bobunny sheet of paper to the chipboard with double sided tape - I prefer to use strong tape than glue to adhere paper to chipboard.  I cut out the top note shape from another Bobunny sheet of paper and glued it down on the right hand side of my layout.  That was then the base of my layout.

Here are more detailed photographs with detail on the embellishments:

I inked a paper doily with chipped sapphire distress ink, positioned a Tim Holtz flourish cut from navy blue cardstock and ran a decorative  blue felt ribbon from the top to the bottom of the Bobunny paper.  I absolutely loved how the Bobunny sticker fitted perfectly in the middle. of the doily.


The floral arrangement is a mixture of WOC white roses - 3 of which I tinted with autumn nights glimmer mist.  The silver leaves peeping from under is from my Xmas stash - fitted in perfectly with the blue, icy theme of this layout.  The silver sprays are also from WOC and the pale purple flowers are 3D stickers I bought at a local supplier.


The delicate white flower trim and black lace I bought at a local sewing supplier. I love the soft tomes of the blue and lavender flowers and you will find them in different shades scattered throughout a few different projects of mine.  They were hair accessories on sale for 2 for 1 dirham so I bought a pile of them and carefully removed the flowers from the felt band (which I also used to make flowers with).  One has to think outside the box yeah!

I love how the pale purple/blue 3D flowers and white flowers blended in with the background of the awesome Bobunny papers.  Have I ever mentioned how much I love Bobunny papers :-).  Yeah all the time...


The 2 different blue flowers are also hair accessories I carefully took apart.  The white flower under the transparent flower is from WOC; I patted it with chipped sapphire distress ink to give it some tone before gluing down the transparent flower.  This transparent flower is also from my Xmas stash. I outlined the flower with blue glitter, hardened it with glossy accents when the glitter was dry - a grey bead  finished off that flower perfectly.


The pale blue sprays are from my stash, silver leaves from my Xmas stash and the beautiful white and silver flower sprays are from WOC.  The chilly sentiment is from the sticker collection.
Here is a close up of  top right hand arrangement I described.  I rolled the edge inward and hot glued it for extra support.  I inserted a tag from the collection and tied it with pale lavender ribbon to match the 3D flowers.  Again readers, that gorgeous blue flower is also a hair accessory!


The photograph is surrounded by my icy blue floral arrangements.  The pale pink flowers by my hair are from WOC and they are my favourite flower to use...I love WOC products!

I hope you could pick up some tips; please drop me an email if you have any questions and please leave a comment.

Thanks for stopping by...


Monday 11 June 2012

Time of My Life Book

I made this mini book for my daughter as a 18th birthday gift!  She went to South Africa for the summer vacation so I had almost 3 months to pour all my love into creating it in such a way that it was totally unique to her!  The look on her face as she paged through it was priceless!  With eyes shining she said 'Mom you really know me...I did not know you took notice of that I said"!  That was all the appreciation I needed!!

Well here are the pages, much of the personal tags etc were removed for photograph purposes so enjoy the pages and please do leave a comment.

All the pages are cut from thick poster board; I did it by hand :-).  On each page I glued decorative paper, sanded the edges with an old nail file and inked all the edges with walnut stain.


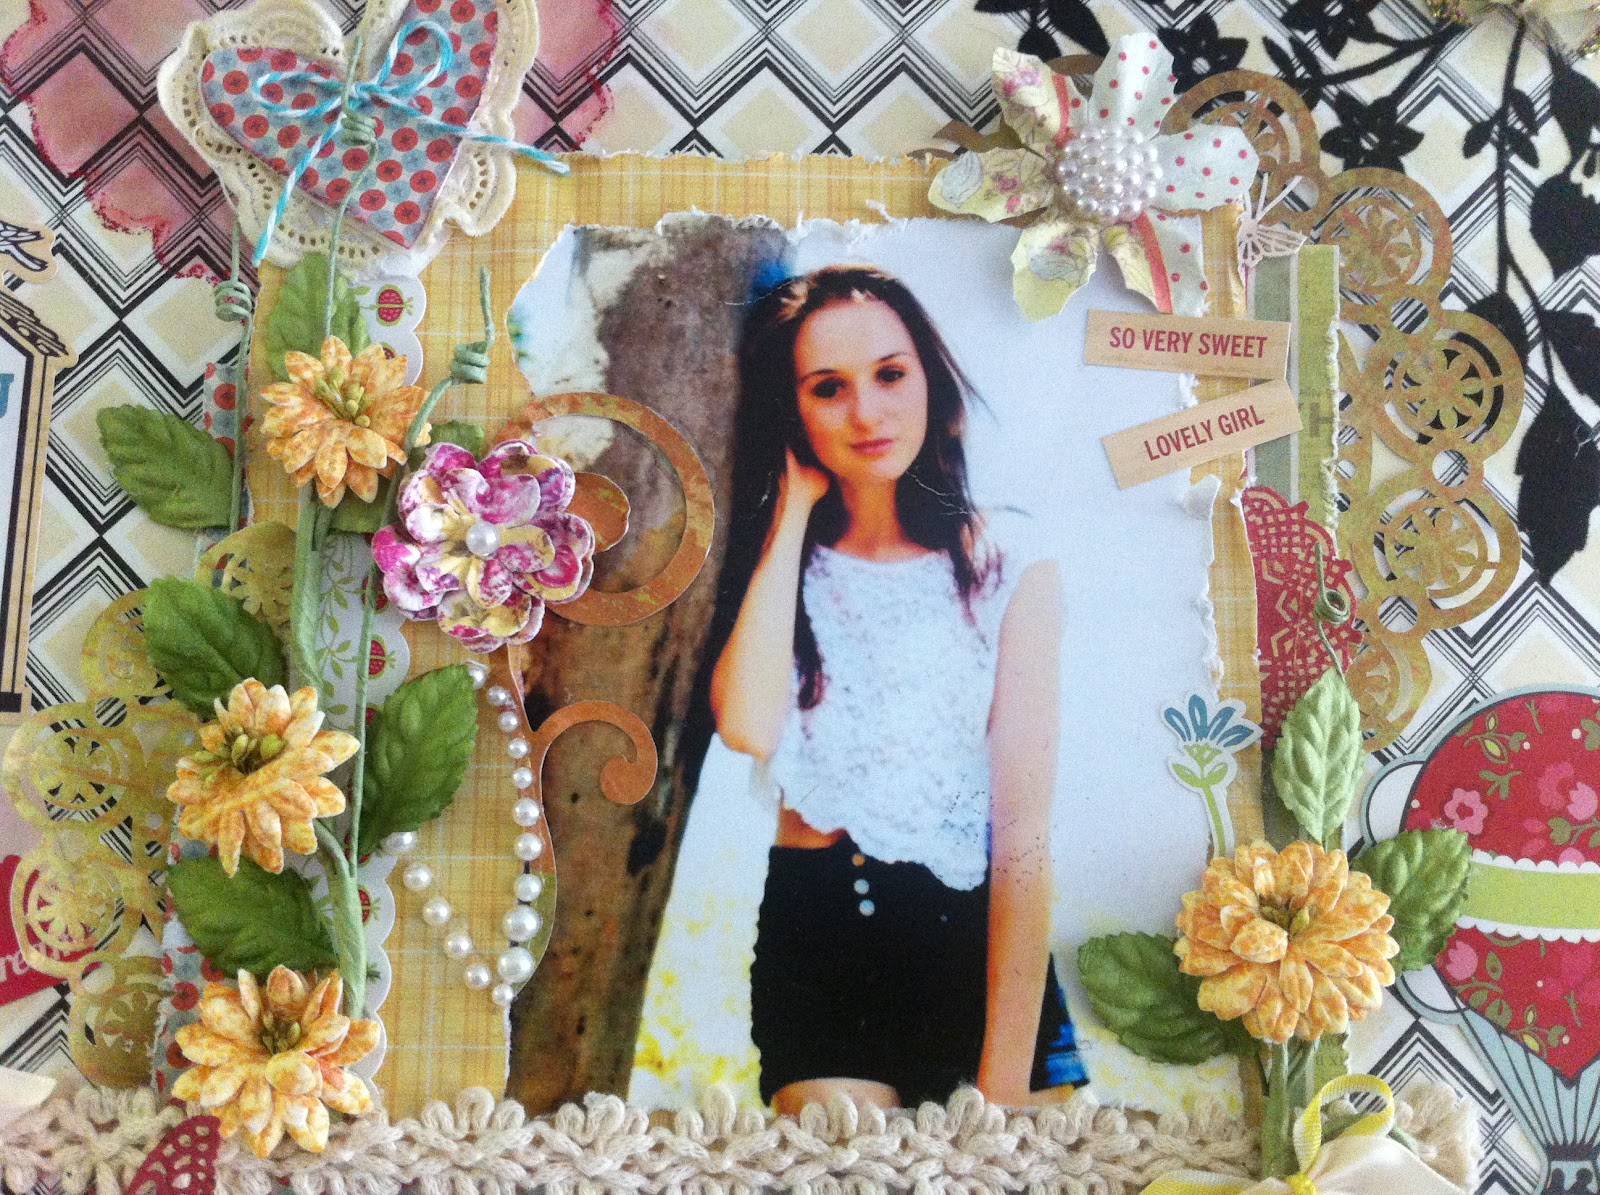
The word 'time' is an alphabet that was part of a free kit on the internet.  I created 'of my life' on my laptop, tore the edges and inked them with walnut stain.  Before I glued down the decorative paper I adhered thin blue ribbon on the front and back covers to secure the mini book with a bow.  The trinket is from Bobunny and the key is a random key which I found around the house.  The photo frame is a print out from the internet.  I fussy cut the frame,  gesso'd it and applied glossy accents.  There is a acetate cover under the frame over the photo to protect it.  I changed the photo of her to black and white and layered a quote on the left hand side of her face.  Roses, flowers, a button and feathers completed the look.  Lots of fibres and ribbons around the extra large ring binders.


I love this photo of her - it so portrays her...always smiling with a great sense of humour.  I stamped imagine of her hand, earring in her ear, fund on the side and lots of bling and inspirational stamps.  She models so thus the elegant lady in a black dress - this is also a cut out from the internet. 


This page is for all her little secret notes she had stuck in a plastic sleeve.  I made my own envelope with decorative paper, attached a 'keep out' sign which resembles a gate.  It lifts up to reveal access to the envelope - she now keeps all her little notes in there.  The page reads Life Unscripted!  The hour glass and clock face is a cut out from the internet while the hands of the clock is Tim Holtz I believe.  A butterfly, mini sunflower and some bling completed this page.  The alpha is also free off the internet; I fussy cut it and popped up every second letter with tiny foam squares


This page provides photo mat squares for the family.  I created the names on my laptop and used thick foam tape to secure to the page.  A red heart, some 3d plastic flowers and swirls add a nice finishing touch.   


This little envelope insert I created for her to keep track of the things in her life she is grateful for.  Being a life coach I constantly remind her to do that and when things seem really bad to her, to take out her note pad and jot down that which she takes for granted.  She writes down her little lists from time to time and keeps them in here (I removed them for photograph purposes).


This page is dedicated to her love of music.  She is an eclectic like me and has also started to write some of her own tunes.  She plays guitar and has a goal to learn to play the piano.  All the images, pages you see are printed off the internet.  I layered some Prima flowers and added a tiny brown glass flower.  Applied glossy accents to the guitar and adhered it to the page with a brad - the guitar swivels out.  There is some layering and I added some flower soft to the bunch of flowers in the girls hand. I scattered music notes around the page and also created some tags out of music sheets I found on the internet. The pink butterflies are from my stash and everything is inked with walnut stain.


Her other passion is photography and this page is dedicated to it.  I found an unusual picture on the internet in beautiful hues of green and blue - looks much like a mythical under the sea scene (I know its too visible here).  I created a envelope with this paper and adhered it to the page in such a way that she could also slide images under the envelope as well as inside.  I took photos as close as I could without revealing what she had written and keeps on this page).  There is a camera charm, some other embellies and really unique photo's she has taken of friends.  Lots of notes, tabs and a net at the bottom of the envelope for more keepsake space.  I felt the net added to the under the sea theme :-)


She has a cat called Matt - found him when he was a kitten abandoned near the garbage/dumpster area of the apartment tower we live in.  They absolutely love each other and she takes more photographs of him than she does of us her family "smile".  So this insert is called 'Ode to Matt" .  She has yet to fill it with poems, photo's etc. ..too cute


She has maintained strong ties with her friends back home via social networks etc; plus every year we fly them back home for the long summer vacation.  School usually closes here in Dubai mid June and re-opens for the new academic year early September - it is usually the hottest time of the year too and these intense heat can be pretty unpleasant.  This page is dedicated to her SA friends and contains photo mats and some embellies.  I found a t-shirt on the internet, re-sized it, placed a SA map and the words besties on it.  I created the pocket for the photos and also used a TH pin for decoration.


This insert is a envelope I purchased at a LSS.  Added a acetate square, a jean pocket  and secured a heart that reads BFF.  Her best friend lives in South Africa and in this envelope she keeps photos, notes, stubs, trinkets regarding their friendship.  The back of the envelope reads party :-)


Like the SA besties page, this one is dedicated to the wonderful friends she has made in the UAE.


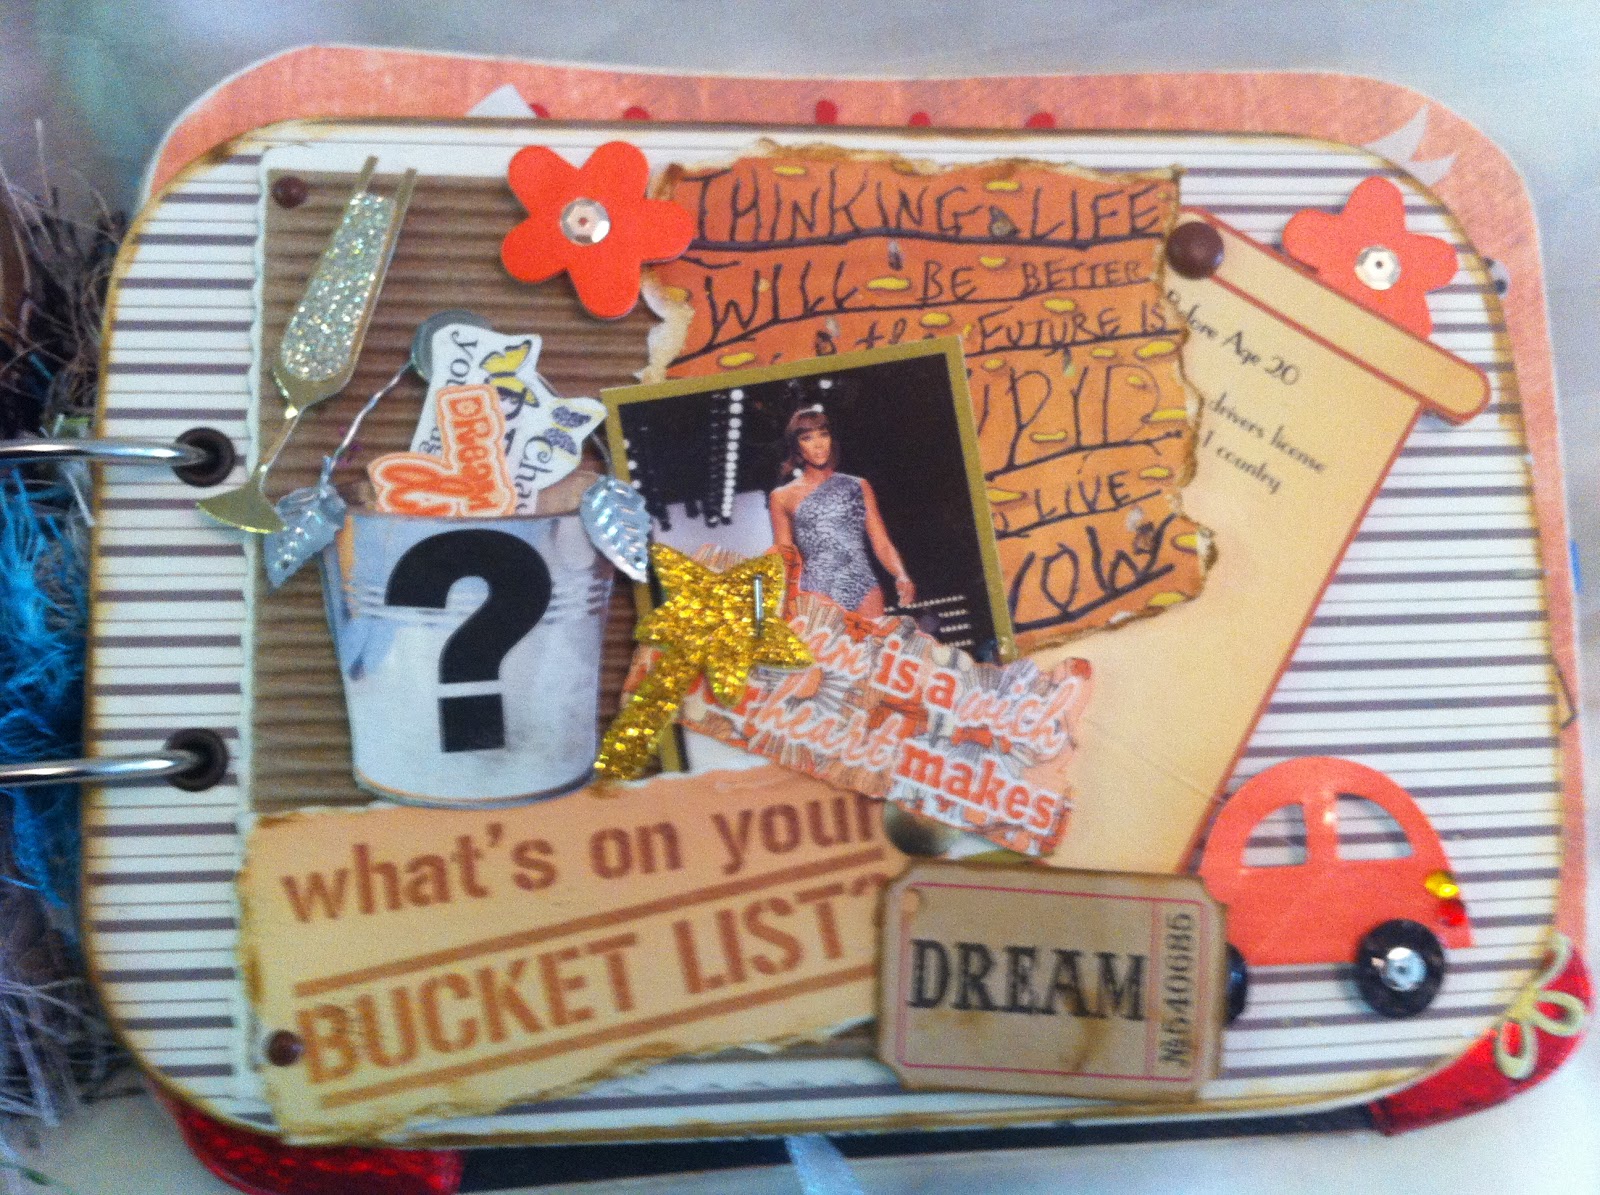
She has so many dreams I therefore had to create this page for her.  I called it "What is on your bucket list".  I provided scroll like tags for various times in her life so she could update her list as she grew older.  I know she wants a car when she goes to university and she has dreams of becoming an international model.  I secured a corrugated square with brads onto the decorative paper - she can also slide her lists under there.


I found this bucket image on the internet and used some silver crafting wire to create the handle of the bucket.  I printed and fussy cut the bucket twice and placed it on the corrugated board in such a way that I could insert some tags into bucket. 


This page hold her stubs for all the concerts she attended and all the movies she saw.  I created envelopes from decorative paper, created concerts and movies black sleeve on my laptop.  Found the images of singers and movies on the internet. Very easy page to create! 


The last page I titled "to all the boys I've loved before" and created a corset type of heart to store her little bits in it.  So just red hearts with black lace etc.  I am a bit of a strict mom so she does not have much to put in there yet - but I am sure once she starts university it will fill up quite quickly :-)


The back of the mini and a top view  below:-)


I made this book last year July and more than 80% of this book I created with papers and images from the internet.  One does not always need fancy and expensive scrapbook papers and embelishments however beautiful! There are times when the imagination is your best tool ever! 

I loved making this for her and she loves her mini book.  We hope you enjoyed peeking into the pages and who knows, maybe we have inspired you to create similar. Thanks for stopping by...